Saving and loading a game is something that any game should have by default these days. But after all these years, we still don’t have a universal way of saving data and each game uses different methods for storing and loading their info. This is pretty much normal, since the way we store the data depends on the type of game you’re making and how you’re making it.
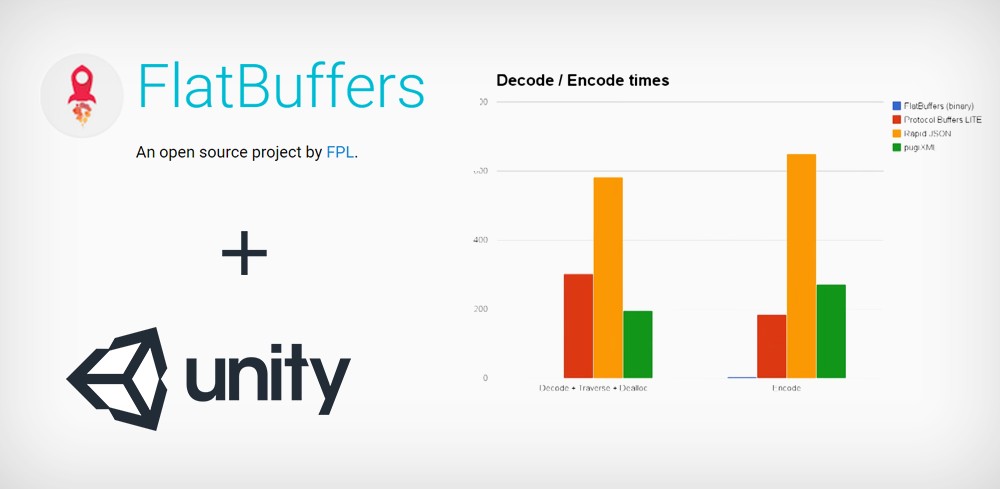
For us, Afterloop is all about zero loading times, and choosing a format like XML and JSON for saving was out of question due to their slow parsing speeds.
We started with binary serialization, but soon enough we had problems making saves backwards compatible, we needed SPEED and FLEXIBILITY.
Flatbuffers had everything we needed.
In this post, I’ll explain how we used flatbuffers for saving and loading data in Unity.
Flatbuffers might seem scary and mysterious at first, but in reality it’s not that hard to use !
Obviously, this is not something that beginners should use but since I couldn’t find any examples of flatbuffers with Unity3D on the web, I had to make this post.
For more info about flatbuffers, check this video:
1- First step is to get the “flatc” compiler and “FlatBuffers.dll”
Flatc is used to convert schemas into c# code which I’ll explain later, and the dll is the main library.
You can download the latest release at :
https://github.com/google/flatbuffers/releases
or you can simply compile the bleeding edge version yourself like a pro ( not recommended ) :
https://github.com/google/flatbuffers
You first either compile or simply download the latest flatc.exe file,
then you go to “\net\FlatBuffers” folder inside the source and open up “FlatBuffers.csproj”
and compile it to get the “FlatBuffers.dll” which you’ll need to put inside your unity project ( I put it inside assets/plugins folder ).
What I did next was create a separate folder for my compiler and schema like this :
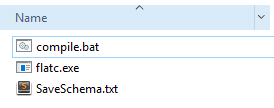
And instead of hurting my fingers by writing same command to compile over and over again, I simply made this dumb batch script ( compile.bat ) which contains these lines :
flatc -n SaveSchema.txt --gen-onefile
@pause
This executes flatc with parameters such as “-n” for c# code generation, “–gen-onefile” for generating all classes inside one .cs file which is optional, and finally “@pause” which is also completely optional but it prevents from the console window from closing automatically ( useful when you have compile errors ).
And for demonstration purposes, I’ll use a demo SaveSchema.txt file :
// example save file

namespace CompanyNamespaceWhatever;

enum Color : byte { Red = 1, Green, Blue }

union WeaponClassesOrWhatever { Sword, Gun }

struct Vec3 {
  x:float;
  y:float;
  z:float;
}

table GameDataWhatever {
  pos:Vec3;
  mana:short = 150;
  hp:short = 100;
  name:string;
  inventory:[ubyte];
  color:Color = Blue;
  weapon:WeaponClassesOrWhatever;
}

table Sword {
  damage:int = 10;
  distance:short = 5;
}

table Gun {
  damage:int = 500;
  reloadspeed:short = 2;
}

root_type GameDataWhatever;
file_identifier "WHAT";
The schema file is what defines the structure of the save, and what values are gonna be saved.
For more info on the schema syntax please read this official doc page.
Once you execute compile.bat it’ll create a new file named “SavedSchema.cs”
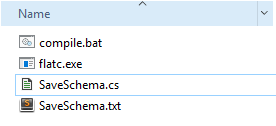
Flatc now generated several classes with names such as “WeaponClassesOrWhatever”
This file is your whole loading and saving system for that schema, this file is now your ultimate file.
2- Next step, how do we save our data?
The generated .cs file contains all classes and functions required to save and load data from and to flatbuffers. But in order to load, we’ll need to save something first.
Place that generated file into your project
( Also don’t forget to place “FlatBuffers.dll” in your project or else you’re gonna see some errors )
Then place this code :
// Create flatbuffer class
FlatBufferBuilder fbb = new FlatBufferBuilder(1);

// Create our sword for GameDataWhatever
//------------------------------------------------------

WeaponClassesOrWhatever weaponType = WeaponClassesOrWhatever.Sword;
Sword.StartSword(fbb);
Sword.AddDamage(fbb, 123);
Sword.AddDistance(fbb, 999);
Offset<Sword> offsetWeapon = Sword.EndSword(fbb);

/*
// For gun uncomment this one and remove the sword one
WeaponClassesOrWhatever weaponType = WeaponClassesOrWhatever.Gun;
Gun.StartGun(fbb);
Gun.AddDamage(fbb, 123);
Gun.AddReloadspeed(fbb, 999);
Offset<Gun> offsetWeapon = Gun.EndGun(fbb);
*/
//------------------------------------------------------

// Create strings for GameDataWhatever
//------------------------------------------------------
StringOffset cname = fbb.CreateString("Test String ! time : " + DateTime.Now);
//------------------------------------------------------

// Create GameDataWhatever object we will store string and weapon in
//------------------------------------------------------
GameDataWhatever.StartGameDataWhatever(fbb);

GameDataWhatever.AddName(fbb, cname);
GameDataWhatever.AddPos(fbb, Vec3.CreateVec3(fbb, 1, 2, 1)); // structs can be inserted directly, no need to be defined earlier
GameDataWhatever.AddColor(fbb, CompanyNamespaceWhatever.Color.Red);

//Store weapon
GameDataWhatever.AddWeaponType(fbb, weaponType);
GameDataWhatever.AddWeapon(fbb, offsetWeapon.Value);

var offset = GameDataWhatever.EndGameDataWhatever(fbb);
//------------------------------------------------------

GameDataWhatever.FinishGameDataWhateverBuffer(fbb, offset);

// Save the data into "SAVE_FILENAME.whatever" file, name doesn't matter obviously
using (var ms = new MemoryStream(fbb.DataBuffer.Data, fbb.DataBuffer.Position, fbb.Offset)) {
    File.WriteAllBytes("SAVE_FILENAME.whatever", ms.ToArray());
    Debug.Log("SAVED !");
}
The way you write your data is ORDER DEPENDENT.
You always have to create items from inside out.
Starting from everything that object contains ( such as strings, arrays, other objects ) to the object itself.
Basically, you have to create objects upfront before setting them inside another object.
So what happens here is :
We create the weapon and string first because it’s gonna be inside the GameDataWhatever.
Everything that can have a variable length needs to be setup first before it is inserted in the buffer.
And only then once we have them setup, we create GameDataWhatever in which we’re gonna set those values.
The saving part can be really tricky, I advise you to read this page to have a better understanding on how to store data.
3- Finally, reading the file is a piece of cake.
Reading can be done in any order you want, if you want you don’t even need to go through all values because flatbuffers work like magic !
ByteBuffer bb = new ByteBuffer(File.ReadAllBytes("SAVE_FILENAME.whatever"));

if (!GameDataWhatever.GameDataWhateverBufferHasIdentifier(bb)) {
    throw new Exception("Identifier test failed, you sure the identifier is identical to the generated schema's one?");
}

GameDataWhatever data = GameDataWhatever.GetRootAsGameDataWhatever(bb);

Debug.Log("LOADED DATA : ");
Debug.Log("NAME : " + data.Name);
Debug.Log("POS : " + data.Pos.X + ", " + data.Pos.Y + ", " + data.Pos.Z);
Debug.Log("COLOR : " + data.Color);

Debug.Log("WEAPON TYPE : " + data.WeaponType);

switch (data.WeaponType) {
    case WeaponClassesOrWhatever.Sword:
        Sword sword = new Sword();
        data.GetWeapon<Sword>(sword);
        Debug.Log("SWORD DAMAGE  : " + sword.Damage);
        break;
    case WeaponClassesOrWhatever.Gun:
        Gun gun = new Gun();
        data.GetWeapon<Gun>(gun);
        Debug.Log("GUN RELOAD SPEED  : " + gun.Reloadspeed);
        break;
    default:
        break;
}
There you go !
We tested flatbuffers on all major mobile platforms ( iOS, Android, Amazon Os, Windows Phone ) we’re building on and it works pretty well.
4- Source Code for Unity
If you want the full working sample code along with compiled flatbuffer files flatc.exe and flatbuffers.dll, then download this file :
FlatBuffersTest.zip